Herringbone Tiles: Cost, Layouts and Laying in Melbourne
Herringbone is one of the most requested tile patterns we see across Melbourne homes right now. It’s not a new idea. Builders have used this zigzag layout for centuries, on roads, floors and parquetry. But it still looks fresh in a modern kitchen or bathroom. If you’re weighing up herringbone for your next reno, let’s discuss what it costs, which tiles suit it, and how a tiler actually sets one out.
What is a herringbone tile pattern?
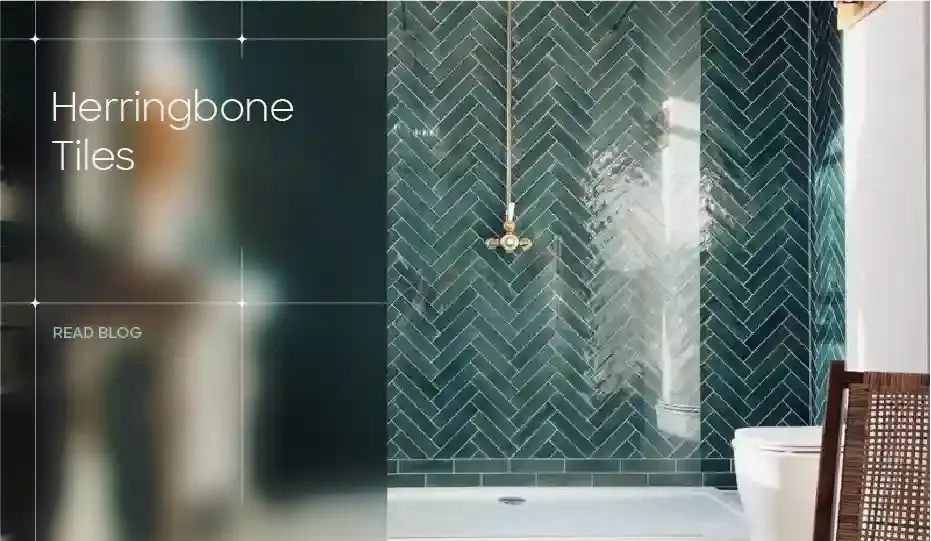
A herringbone pattern uses rectangular tiles laid at an angle so each tile sits perpendicular to the next. The result is a broken zigzag, a bit like the bones in a fish skeleton, which is where the name comes from. Each tile end lines up with the side of the next one, forming a series of interlocking V shapes across the floor or wall.
It’s a pattern, not a tile type. You can use subway tiles, timber-look planks, or natural stone. The layout is what changes.
Herringbone vs chevron
People mix these two up often. Herringbone tiles are cut straight and butt against each other at 90 degrees, so the zigzag has a slight offset or step. Chevron tiles are pre-cut at an angle, usually 45 degrees, so the point forms a continuous unbroken line. Chevron gives a sharper, more formal look. Herringbone feels a little more relaxed and traditional.
45-degree vs 90-degree herringbone
Herringbone can run at 45 degrees to the wall, which is the classic diagonal look, or at 90 degrees, which runs straight along the room. The 45-degree version tends to make a small room feel bigger because it draws the eye across the space. The 90-degree layout is calmer and works well in long hallways or narrow bathrooms.
Single, double, and triple herringbone
Single herringbone uses one tile per arm of the V. Double herringbone pairs two tiles together on each arm, which makes the pattern bolder and reads well from a distance. Triple herringbone is rarer and works best with narrow tiles like small format subway shapes. For most Melbourne homes, single or double herringbone is the practical choice.
Where herringbone works best
Herringbone isn’t limited to one room. However, some spaces show it off better than others.
Kitchen splashbacks
A herringbone splashback behind the stove or sink adds texture without needing a busy tile colour. Even a plain white subway tile looks far more interesting once it’s set on an angle. If you’re still deciding on tile shape and material for this area, our kitchen splashback ideas guide covers a few more layout options worth comparing.
Bathroom floors and feature walls
Herringbone on a bathroom floor gives a small room some visual movement. It also works well as a shower feature wall, especially paired with a plain tile on the surrounding walls so the pattern doesn’t compete with itself.
Hallways and living areas
In larger areas, herringbone floors read as a design feature rather than just flooring. It suits timber-look planks particularly well here, since the pattern mimics old parquetry floors.
Which tiles suit a herringbone layout?
Not every tile works. The shape and finish matter more than people expect.
Subway and rectangular formats
Rectangular tiles are the standard choice for herringbone. Subway tiles in particular are cheap, widely available, and forgiving to cut. If you want to see how these tiles perform in other layouts too, have a look at our guide on subway tile layouts and patterns.
Marble look and stone
Marble look porcelain tiles bring a higher-end finish to herringbone without the price or maintenance of real stone. Natural marble and limestone can also be laid this way, though they need sealing and cost more in labour due to their weight and fragility.
Timber look planks
Timber-look tiles in a herringbone layout give the classic parquetry look with none of the moisture issues real timber floors have in wet areas. This is a popular choice for open plan living zones that flow from a kitchen.
Formats to avoid
Very large format tiles don’t suit herringbone well. The pattern relies on a certain rhythm of cuts, and oversized tiles make the layout look clunky rather than elegant. Square tiles don’t work at all, since the pattern needs a rectangular shape to create the V.
Is herringbone tiling more expensive?
Generally, yes. Herringbone costs more than a straight lay because of the extra time and material involved.
Extra labour per square metre
Every tile in a herringbone layout needs to be measured and often cut individually, especially near walls and corners. A straight lay might take a tiler a day for a small bathroom floor. The same floor in herringbone can take one and a half to two days. Naturally, that extra time shows up in the quote.
Cutting and wastage allowance
Because of the angled cuts, herringbone uses more tile than a standard layout. We usually allow for 15 to 20 percent extra tile for wastage, compared to around 10 percent for a straight lay. It’s worth budgeting for this upfront so there are no surprises later. For a broader breakdown of costs by room, our Melbourne tiling cost guide is a good place to start, and it’s one of our more recent posts if you want the full picture on pricing.
Here’s a rough comparison to give you an idea:
| Layout | Labour time (per m²) | Tile wastage |
| Straight lay | Standard | 8 to 10% |
| Herringbone (single) | 30 to 50% more | 15 to 20% |
| Herringbone (double) | 40 to 60% more | 18 to 22% |
These are general ranges. Your actual quote will depend on the tile size, room shape, and how many corners or fixtures need cutting around.
How a tiler sets out a herringbone floor
Getting a herringbone pattern right isn’t just about laying tiles one after another. It needs planning before any adhesive goes down.
Finding the centre line and starting point
A tiler will usually mark a centre line through the room first, then dry lay a few rows to check how the pattern falls at the walls. Starting from the wrong point can mean awkward slivers of tile at the edges, which look messy and waste material.
Keeping the pattern square across the room
Even a small error in the first few rows multiplies as the pattern spreads across the floor. That’s why experienced tilers check the layout with a square and string lines regularly, not just at the start.
Managing lippage with a levelling system
Lippage is when the edge of one tile sits higher than its neighbour. It’s more common in herringbone because of the number of joins. Tile levelling clips help keep every tile flush, which matters both for how the floor looks and how safe it is to walk on.
Grout colour and joint width for herringbone
Grout colour changes the whole feel of a herringbone pattern. A matching grout keeps the pattern subtle, letting the tile itself do the talking. A contrasting grout, like a dark charcoal against a white tile, makes the zigzag pop and turns it into a real feature.
Joint width matters too. Narrower joints, around 1.5 to 2mm, give a tighter, more refined look. Wider joints suit a more relaxed, rustic style. Either way, keep the width consistent throughout, since uneven joints are one of the first things people notice in a herringbone floor.
Is herringbone still in style?
Short answer: yes. Herringbone has been used in flooring for hundreds of years, and it’s not tied to one particular design trend the way some tile looks are. It works in period homes, new builds, and everything in between. However, styling does shift. Right now, we’re seeing more natural, earthy tones in herringbone layouts, moving away from the stark black and white combinations that were popular a few years back.
Herringbone mistakes we get called out to fix
We get called out fairly often to fix herringbone jobs that didn’t go to plan. The most common issues are an uneven starting point that leaves thin slivers of tile at one wall, lippage from skipping a levelling system, and grout lines that drift out of square as the pattern moves across the room. Most of these come down to rushing the set-out stage. It’s worth spending the extra time here, since fixing a finished floor is far more disruptive than getting the layout right the first time. You can see examples of pattern work we’ve completed properly over on our projects page.
Frequently asked questions
Is herringbone tiling more expensive?
Yes, usually by 15 to 30 percent more than a straight lay, mostly due to extra labour and cutting.
Is herringbone out of style in 2026?
No. It remains one of the most requested patterns in Melbourne homes, with newer projects leaning toward warmer, natural tile tones.
Is herringbone tile difficult to install?
It’s more time-consuming than a straight lay, but not more difficult with the right setup. A tiler with pattern experience will get a cleaner result than someone doing it for the first time.
What type of tile is best for a herringbone floor?
Rectangular subway tiles, timber look planks and marble look porcelain all suit herringbone well. Avoid large format or square tiles.
For a wider look at design inspiration beyond product pages, Houzz has a large photo library of completed herringbone spaces worth browsing before you settle on a layout.
If you’re ready to get a herringbone floor or splashback done properly, our tiling service covers pattern work across Melbourne. You can also browse more guides like this on our blog.