Subway tiles have been around for over a century, and they still top the list for kitchen and bathroom renovations. Walk into any new build or renovated home in Melbourne, and there’s a good chance you’ll spot them somewhere. They’re simple, they work with almost any style, and they never really go out of fashion.
If you’re planning a reno and thinking about white subway tiles or something bolder, this guide covers what you need to know. We’ll look at what subway tiles actually are, the layouts you can choose from, and where they work best in your home.
What Are Subway Tiles?
Subway tiles get their name from the New York City subway system. Back in the early 1900s, transit stations used small rectangular tiles to line the walls. The tiles were easy to clean and gave the space a bright, hygienic look. That same style caught on in homes, and it’s stuck around ever since.
A standard subway tile measures 3 by 6 inches, though sizes vary a lot today. You’ll find smaller versions and larger formats like 4 by 8 or even 4 by 12 inches. The shape is what defines them more than the size. Subway tiles are always rectangular, usually with a ratio of about 1 to 2.
Because the shape is so simple, subway tiles suit almost any layout. That’s part of why they’ve stayed popular for so long. A good installer can take a plain tile and turn it into a real feature, just through the way it’s laid. If you want a professional result, our tiling service covers everything from set-out to final grouting, so the finish actually holds up over time.
Popular Subway Tile Layouts and Patterns
The layout you choose changes the entire look of a room, even if you keep the same tile. This is one area where a lot of homeowners get stuck, so let’s break down the main options.
Classic Running Bond
This is the original subway tile pattern. Rows are laid horizontally, with each tile offset by half its length from the one above. It looks like a brick wall, which is why some people just call it the brick layout. It’s the safest choice if you’re not sure what to pick. It suits almost any kitchen or bathroom, and it rarely looks dated.
Herringbone Subway Tile
Herringbone tiles at an angle, usually 45 or 90 degrees, so they form a zigzag pattern. It takes more skill to install and creates more offcuts, but the result is striking. A herringbone subway tile wall works well as a feature behind a stove or in a shower niche. It’s not the cheapest option to install, since the angled cuts take longer, but many homeowners feel it’s worth the extra cost for a statement wall.
Vertical Stack
Turning the classic pattern on its side gives you a vertical stack. Tiles sit directly on top of each other in neat columns. This layout draws the eye upward, so it works well in bathrooms with low ceilings. It also tends to feel more modern than the traditional horizontal brick look.
Stacked Grid
A stacked grid keeps tiles aligned both horizontally and vertically, with no offset at all. Grout lines run straight across and straight down, forming a clean grid. It’s a minimalist choice that suits contemporary spaces, and it’s usually one of the easier patterns to install.
You’ll find plenty of pattern lists online, but few mention the practical side, like lippage or grout joint sizing. That’s worth flagging here. Longer tiles are more prone to lippage, which is when tile edges sit at slightly different heights. A one-third offset pattern reduces this risk compared to the traditional 50 percent offset, so it’s worth asking your installer about if you’re using larger format tiles. You can see some of these layouts in action across our completed tiling projects around Melbourne.
Choosing Colour, Finish and Grout
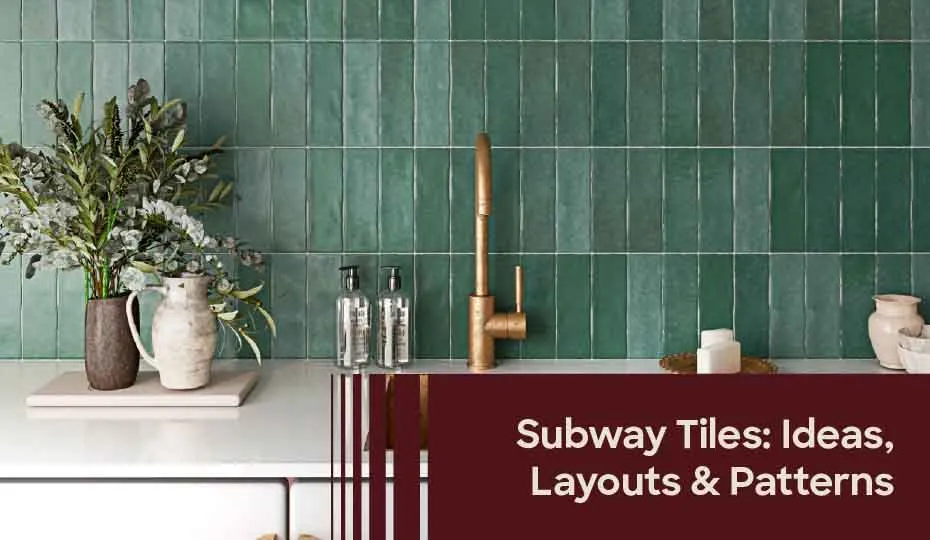
White subway tiles are still the most popular choice, and for good reason. They brighten a room, work with any decor style, and never clash with other finishes. But coloured subway tiles have become far more common in recent years. Soft greens, blues, and terracotta tones are showing up in kitchens and bathrooms that want a bit more personality.
Finish matters just as much as colour. Gloss subway tiles reflect light and suit smaller rooms that need to feel bigger. Matte subway tiles give a softer, more understated look, and they tend to hide water marks better in wet areas. Bevelled subway tiles add a slight edge detail that catches shadow and gives the wall some depth, even in plain white.
Grout is often an afterthought, but it shouldn’t be. White grout gives a seamless look, though it stains more easily and needs regular sealing. Grey grout is the safer middle ground. It hides everyday grime and still lets the tile pattern show through. Black or dark grout creates strong contrast and suits a bold, graphic style, especially with white subway tiles. Whatever you choose, a 2-to-3-millimetre grout joint works for most standard subway tile sizes. Tighter joints look sleeker but leave less room for natural movement in the tile.
Where to Use Subway Tiles
Subway tiles aren’t limited to one room. They show up in kitchens, bathrooms, laundries, and even outdoor areas, though each space calls for slightly different choices.
In a subway tile kitchen, the splashback is usually the star. It sits behind the stove and sink, so it needs to handle grease, heat, and moisture without losing its shine. A classic white subway tile splashback with grey grout is a safe, timeless option that suits most kitchen styles. If you’re after design ideas specific to this space, our Kitchen category has more inspiration and advice.
For a subway tile bathroom, the tile often runs from floor to ceiling in showers or as a half-wall feature elsewhere. Because bathrooms deal with constant moisture, proper waterproofing underneath the tile matters just as much as the tile itself. Skipping this step is one of the most common (and costly) mistakes homeowners make.
Subway tile splashback projects are also popular in laundries and butler’s pantries, where a simple, easy-clean surface makes daily life easier. Whatever room you’re working with, the tile itself is only half the equation. Good prep and correct installation are what make it last.
Ready to get your subway tiles installed properly?
Get a Free Quote or call us on +61 472 712 045.
Frequently Asked Questions
Are Subway Tiles Still in Style?
Yes, and they’ve held that position for well over a hundred years. Trends come and go, but subway tiles keep adapting. New sizes, colours, and layouts keep the look fresh without losing what made it popular in the first place. If you’re worried about resale value, subway tiles are generally seen as a safe, timeless choice by buyers and designers alike.
What Grout Colour Looks Best With Subway Tiles?
It depends on the look you want. White grout gives a clean, seamless finish but shows dirt faster. Grey grout is the most practical choice for busy kitchens and bathrooms, since it hides marks well while still highlighting the tile pattern. Black grout creates a bold, modern contrast, particularly with white or pale subway tiles. There’s no single right answer here. It really comes down to how much contrast you want and how much maintenance you’re willing to do.
Subway tiles are one of those rare choices that work in almost any home, style, or budget. The pattern you pick, the grout colour, and the finish all shape the final look, so it’s worth taking time to plan before you start. For more layout inspiration beyond what’s covered here, Houzz’s guide to subway tile layouts is a solid resource.
If you’d rather leave the planning and installation to professionals, our team handles subway tile projects across Melbourne from start to finish. Reach out for a free quote, and we’ll help you explore the options that best fit your needs.